 free downloadable guide)." width="550" height="790" />
As we move more to online learning, teachers are having to post work online for their students. For many teachers, that means assigning work on Google Classroom. For other teachers, that means emailing work to students or their parents or posting work on their websites or other learning platforms for students to download. One easy-to-use option for teachers to use no matter what platform is to assign Google Forms for practice or quizzes.
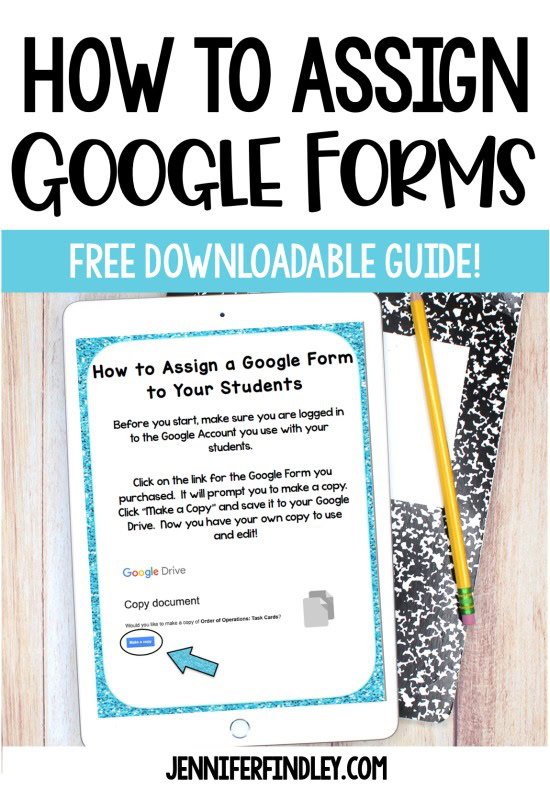
This post will take you through a quick overview of the basics of taking an existing Google Form and assigning that Google Form to your students. I have a more detailed step-by-step guide with images that you can download for free as well.
 free downloadable guide)." width="550" height="790" />
The first thing you want to do when using an existing Google Form is make a copy that is completely yours. If you’re sharing the form with someone else, you’re going to see that person’s student responses, and they’re going to see yours.
Making your own copy in your own Google Drive makes it so you’re the only one sending it out to students. You can also make edits and modifications to the form without making any changes to the original form.
After making your copy, check out the settings on your Google Form and make sure they work for you and your students.
Do you want to collect your students’ email addresses as they complete the form? Limit them to one response and shuffle the question order?
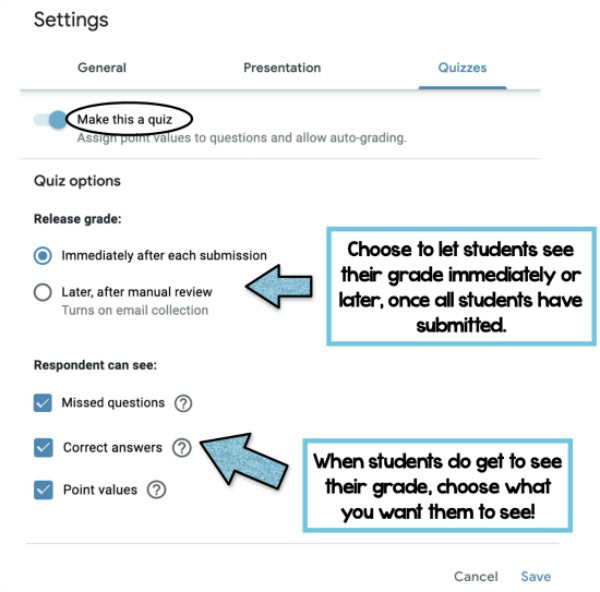
Maybe you want to make it a “Quiz” so you can create an answer key. The “Quiz” option also allows your students to immediately see their results; they can see what they missed, what the right answer is, and how many points they lost.
 free downloadable guide)." width="600" height="592" />
Don’t want them to see results until everyone has completed the form? No problem. You can choose to manually send out results once everyone has done it.
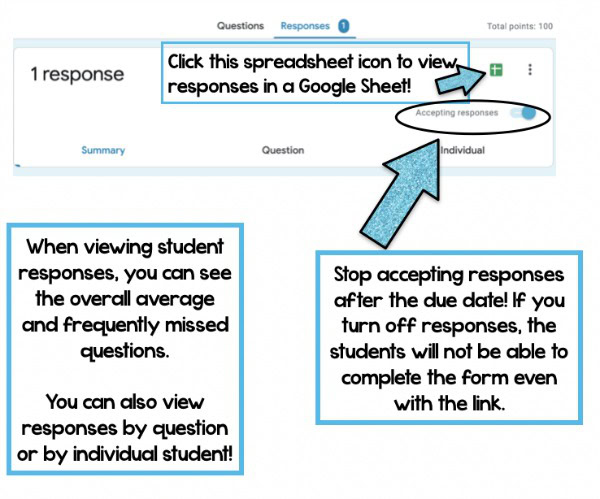
Google Forms also lets you see your students’ responses in several ways! You can view a summary and see the average and frequently missed questions, or view results by question or individual. You can even export your results into a Google Sheet with one click if you’re a spreadsheet person. Want a more detailed guide to viewing and analyzing responses in Google Forms? Click here!
 free downloadable guide)." width="600" height="499" />
The final step is to assign the actual the form to your students.
Before you do, you have one final important step to double check…make sure that you asked for students to enter their names (as a required short answer question).
The most important thing to double check is that the first question asks for your students’ first and last names. This question must also be required. If you do not, you will have no way of knowing who did which form (unless you require emails to be entered).
Once you have double checked that your form requires students to enter their names, you are reading to assign the form.
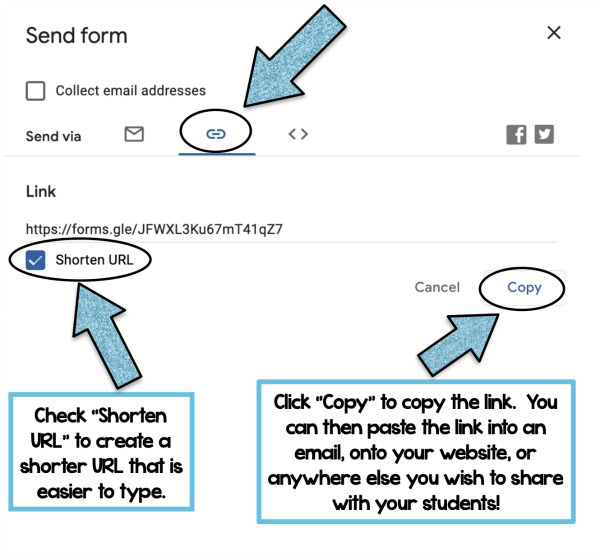
By clicking “Send” at the top corner of your form, you can email the form to your students by entering their email addresses or you can copy the link and send it to parents or post on your website.
 free downloadable guide)." width="600" height="557" />
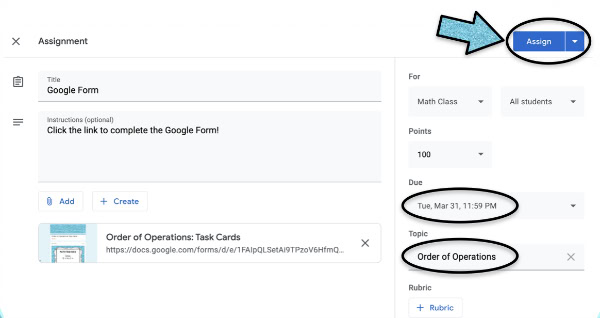
My favorite way to use this link is through Google Classroom. When you’re in Google Classroom, you can create an assignment and add the link that you copied from the form straight to the assignment. You can set a due date and assign the Google Form to all of your students, or a select few, quickly and easily. All students can see it in their own Google Classroom immediately!
 free downloadable guide)." width="600" height="318" />
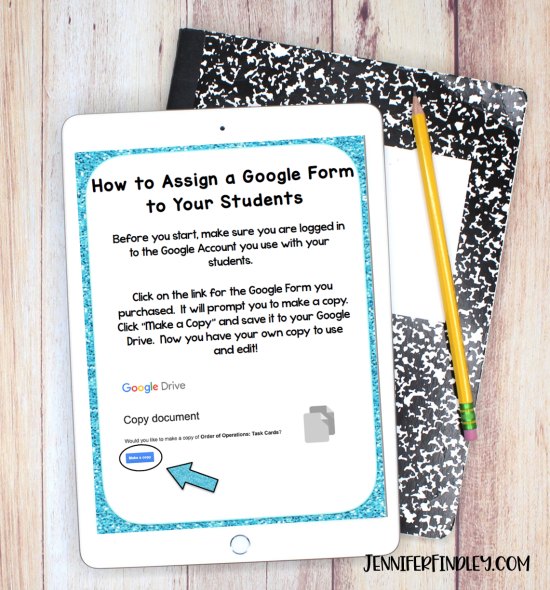
Want a more detailed guide to using Google Forms with your students?
 free downloadable guide)." width="550" height="590" />
If you love using Google Forms, but don’t love creating them and setting them up for easy self-grading, I have just what you need!
Check out these ready-to-assign Google Forms for math and literacy.
All of the work has been done for you and they are ready for you to copy to your drive and assign your students!